RA01 · 4-axis desktop robotic arm

Every part has a purpose.

A real 4-axis robotic arm your students build with a screwdriver, drive with two joysticks, and program in the browser.

4 axes ~160 mm reach 9 V 1 A USB

Black laser-cut acrylic · four servos · dual-joystick controller.

Inside the machine

4

axes of motion

160 mm

working reach

10

hands-on labs

13

weeks of curriculum

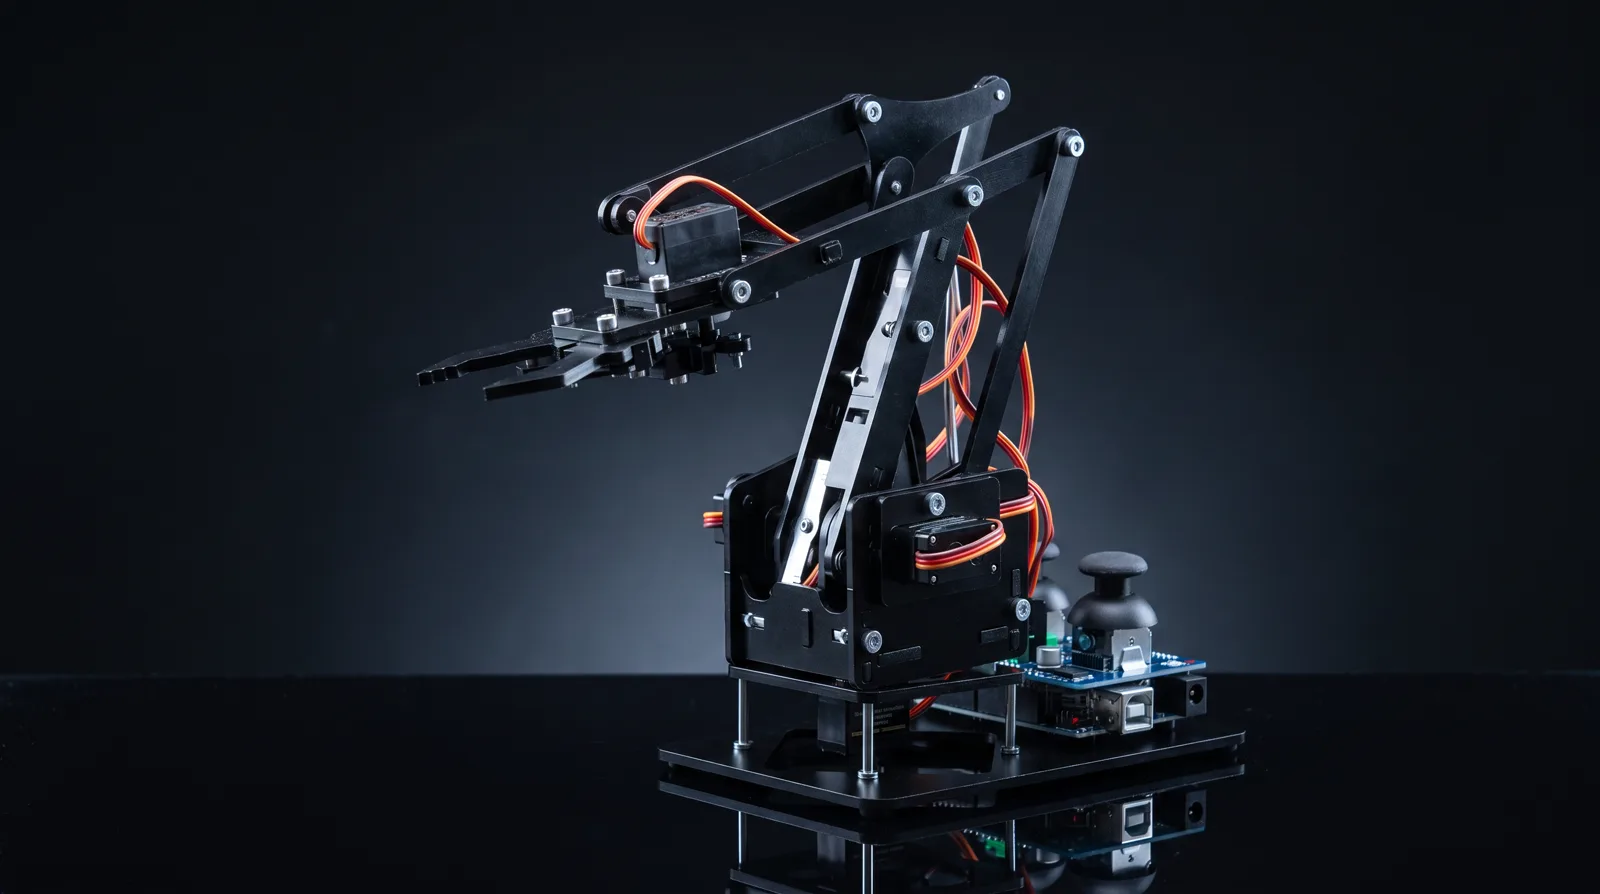
The RA01 robotic arm: black laser-cut acrylic, four servos with orange cables, dual-joystick controller base

The kit that arrives in the box.

Every plate laser-cut and numbered, every servo labeled, every screw accounted for. Students build it in one session with the included screwdriver. No soldering.

Color

Ships in black, with three more colors for class-set orders.

Drive it the second it’s built.

Two thumb joysticks sit right on the controller board, so the arm works before anyone writes a line of code. When the class is ready, the same board reflashes from the browser. The joystick program is just the first firmware it runs.

  • Manual first. Joystick control builds intuition for joints and limits before the code does.
  • Reflash from the browser. One USB cable; the studio compiles and flashes real firmware. No installs.

servo pins 9 / 8 / 7 / 6 9 V 1 A center-positive USB CH340

Four joints, not six. On purpose.

The upper arm is a parallelogram linkage, the same mechanism a desk lamp uses. It keeps the gripper pointing the same way as the arm extends, so there is no wrist to solve.

That is the whole reason a Grade 9 student can write real inverse kinematics for this arm. Six axes needs matrices. Four axes with a fixed wrist needs atan2 and the law of cosines, trigonometry a student already has, doing an actual job.

The frame is laser-cut black acrylic with 80, 80 and 68 mm links. A cracked link is a small, cheap plate that swaps out in minutes, not a reason to retire the arm.

inverse_kinematics.cpp

// L1 = 80 mm, L2 = 80 mm, the two arm links
float d  = sqrt(x*x + y*y);
float a1 = atan2(y, x);
float a2 = acos((L1*L1 + d*d - L2*L2)
              / (2 * L1 * d));

Blocks on Monday. This, by June. Same arm, same browser.

Questions we actually get

Do we need to install anything?

No. The editor, the simulator, the compiler and the USB connection all run in the browser. That is deliberate: school IT departments do not have to approve anything, and it works on a managed Chromebook.

Can students do the course before the arm arrives?

Yes, all of it. Every graded lab runs on a simulated ATmega328P in the browser, and Arm Studio has a Simulate mode that animates the arm from the same maths the real one uses. The hardware turns a passing program into a working machine. It is the reward, not the gate.

One arm between four students, does that work?

It is how most classes run it. Four students each write and grade their own programs in the simulator, then take turns proving them on the shared arm. Nobody waits for hardware to make progress.

Is it really six axes? Some robotic arms are.

No. It has four, and we would rather say so. An earlier version of this page claimed six, which was wrong. Four axes with a parallelogram linkage is the right amount of geometry for school: solvable with trigonometry a student already has, and still genuinely inverse kinematics.

Does the student’s code have to be blocks?

No. Blocks are the on-ramp. One button turns any block program into the real Arduino C++ it represents, which the student can then edit, compile and flash. By module 4 most students have stopped using blocks entirely.

What about Safari and iPads?

The browser standard for talking to USB devices (Web Serial) only exists in Chrome, Edge, Opera and ChromeOS. On Safari or an iPad everything works except driving a physical arm. Blocks, code, the simulator and the graded labs are all fine.
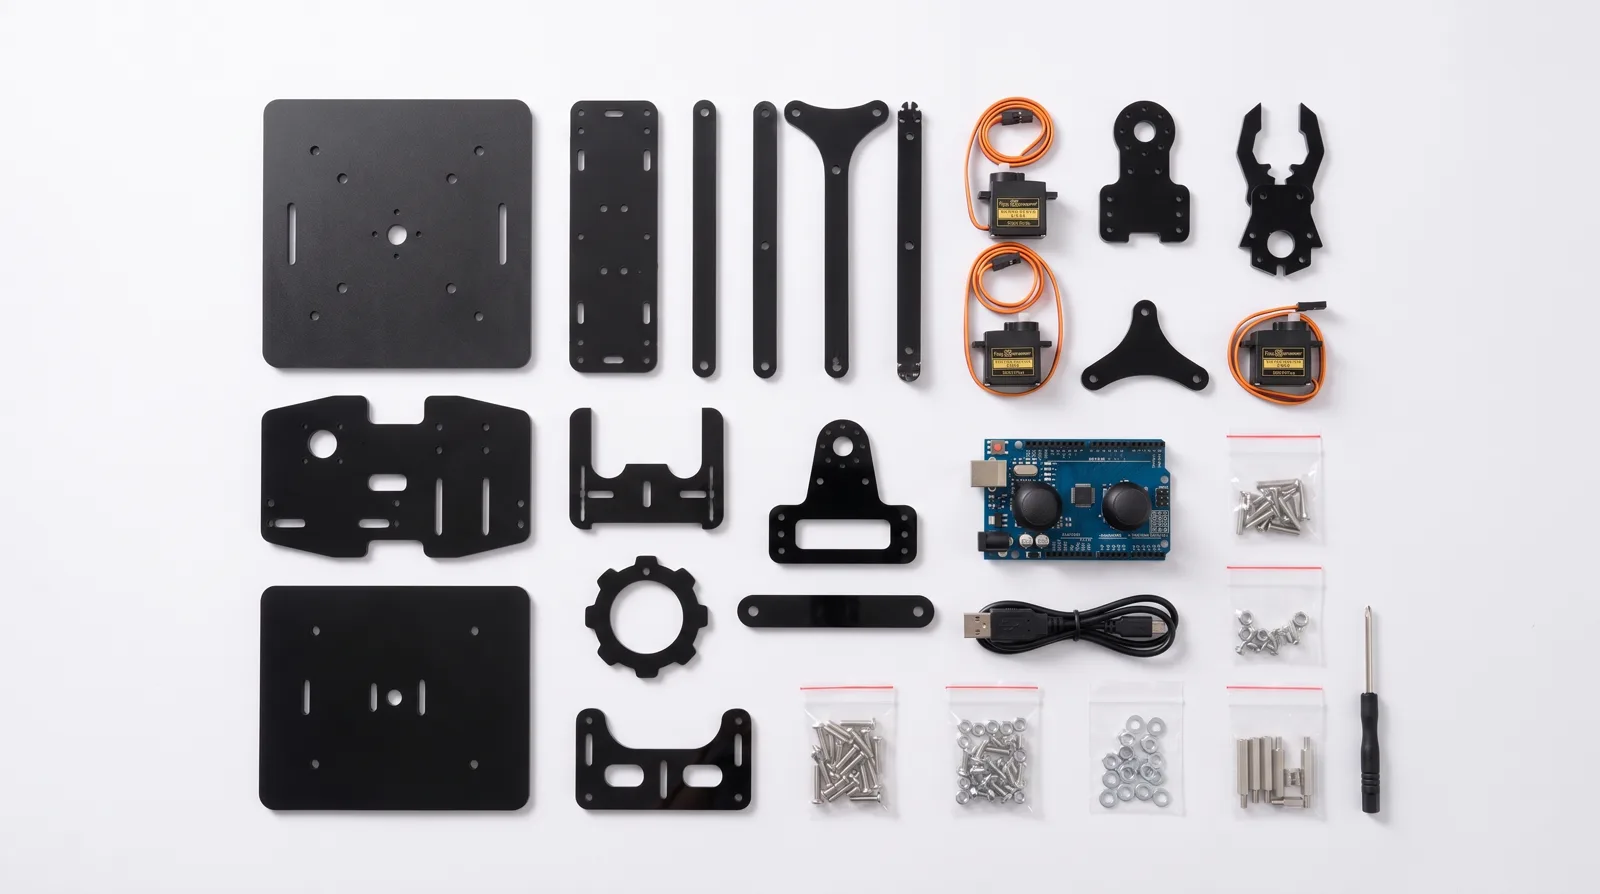
Every part of the kit laid out: laser-cut black acrylic plates, four servos, controller board with joystick shield, fasteners and tools

What is in the box

  • ×1 Laser-cut black acrylic frame parts, every link pre-cut and numbered
  • ×4 SG90-class servos, with a metal-gear upgrade available on class sets
  • ×1 Arduino-compatible controller with dual-joystick shield
  • ×1 USB cable, the only cable you need to code
  • ×1 Screws, standoffs and screwdriver, no soldering anywhere in the build
  • ×1 9 V 1 A power adapter, no lithium cells

Black as standard; clear, blue and orange frames available for class sets.

Specifications

Axes4: base yaw, shoulder, elbow, gripper
Links80 / 80 / 68 mm, parallelogram four-bar keeps the gripper level
Working reach~160 mm
FrameLaser-cut acrylic in black; blue, clear and orange available
BoardATmega328P + CH340 USB-serial, dual-joystick shield
Servo pins9 / 8 / 7 / 6
Power9 V 1 A DC, center-positive 5.5 × 2.1 mm, no lithium cells
ConnectivityUSB; IR and Bluetooth (HC-06) supported, not included
ProgrammingBrowser blocks, Arduino C++, or live serial commands
Browser supportChrome, Edge, Opera, ChromeOS for USB control; any browser for the simulator
SafetyGrades 5-12 (about 10-18), adult supervision for assembly; contains small parts, not for children under 3

Put a real robot on every desk.

The arm, the browser studio, and a semester of curriculum. One box, one budget line.